Build your first Web Agent
At the end of this tutorial, Nimbus CRM has a chat on every page. When you ask it to create a contact, the contact appears in the app. When you ask it to change or delete one, it shows a confirmation card and waits for you.
Nimbus CRM is a small example CRM with contacts, companies and deals, built with React, Express and SQLite. Its code is public at github.com/faustine-ai/example-nimbus-crm.
In this tutorial, you:
- Create the agent
- Connect the repository
- Run the analysis
- Pick the modules
- Set up and launch the agent
- Review the actions
- Make the agent ask before updating
- Install the snippet
- Ask the agent to create a contact
- Read the log of the conversation
Before you begin
- A Faustine workspace with a model provider set up. The analysis in this tutorial uses tokens from that provider. See Connect your model provider.
- A GitHub account, with a fork of
faustine-ai/example-nimbus-crmin it. - Docker, to run Nimbus CRM on your machine, and a clone of your fork.
Create the agent
- In the portal, go to Web Agents and select New Web Agent. The Quick start wizard opens.
- Under Choose your app type, select React.js. Under What is your agent for?, select Get the work done for them.
- Under Details, enter
Support agentas the Assistant name. - Under Environments, clear Staging and select Production. With Production as the only environment, the version you publish later is the one the snippet loads.
- Select Continue.
The wizard shows the name with a Production badge and opens Connect your code.
Connect the repository
- Select GitHub.
- Select Connect GitHub. GitHub asks you to install the Faustine GitHub App. Choose your account, give the app access to your fork only, and install it.
- GitHub sends you back to the wizard with the new connection selected.
- In Repository, select your fork of
example-nimbus-crm. Branch fills in withmain. - In Frontend path, select
app/frontend. The repository also holds the backend, and the agent is built from the front end. - Select Continue.
- Under Keep the assistant up to date, leave Automatic selected and select Continue.
- Under Extra resources, select Skip for now.
- Under Review & create, select Create & start analysis.
The analysis page opens with the title Analyzing your code base to create your assistant.
Run the analysis
The first two stages run without input.
- Clone the repository downloads your fork.
- Analyze the architecture & modules reads the structure of the app. A log shows what the analysis is doing. The stage takes 3 to 10 minutes.
You can leave the page while it runs. To come back, select the agent in Web Agents.
Checkpoint
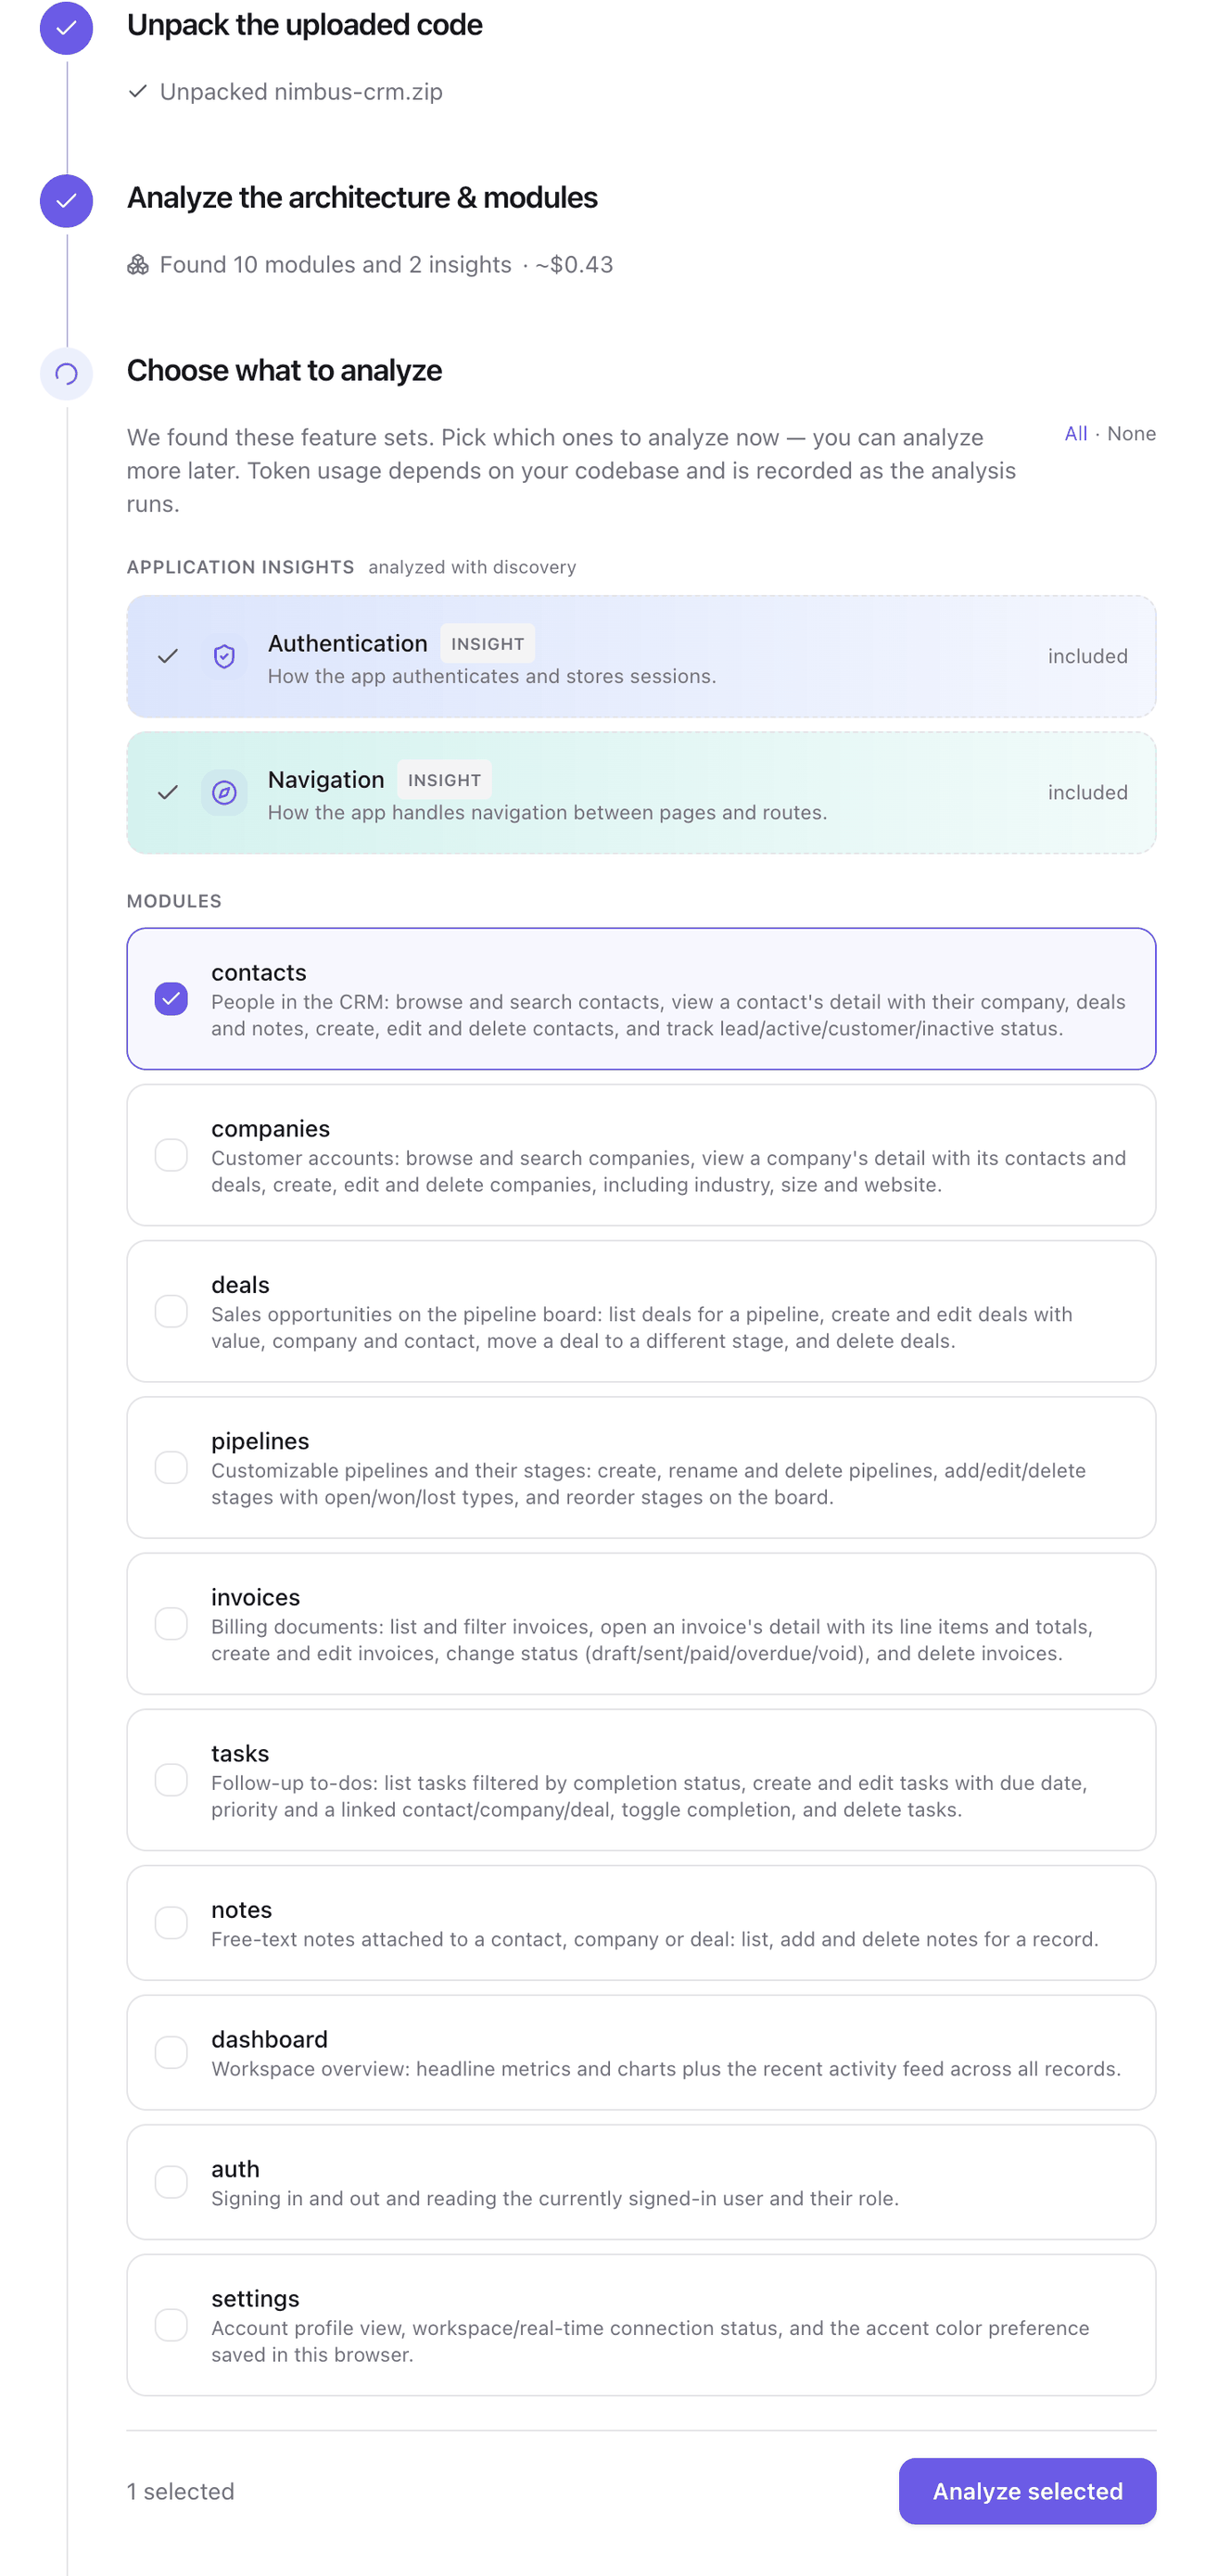
The second stage shows how many modules and insights it found, and Choose what to analyze opens with a list of modules.
Pick the modules
The list has one module for each feature area the analysis found in Nimbus CRM: contacts, companies, deals and the rest. The names and descriptions are written by the analysis, so yours can differ from another run's.
- Select None to clear the selection.
- Select the module that covers contacts.
- Select Analyze selected.
One module keeps the first run short. You can analyze the others later with a re-analysis.
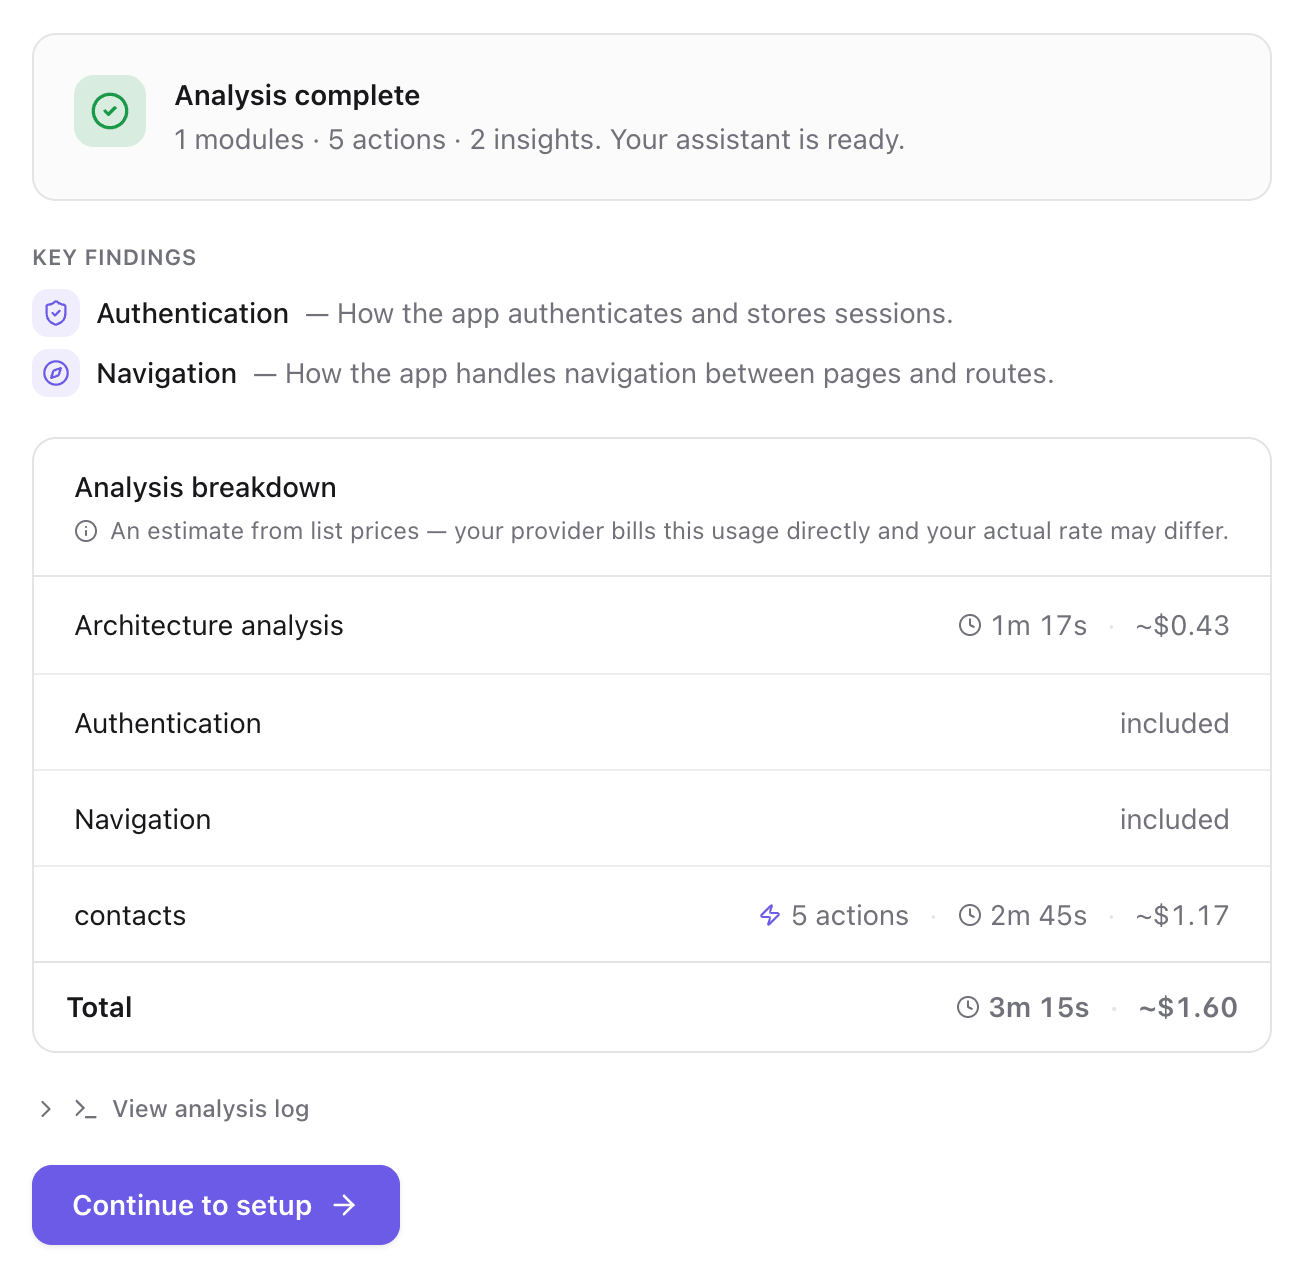
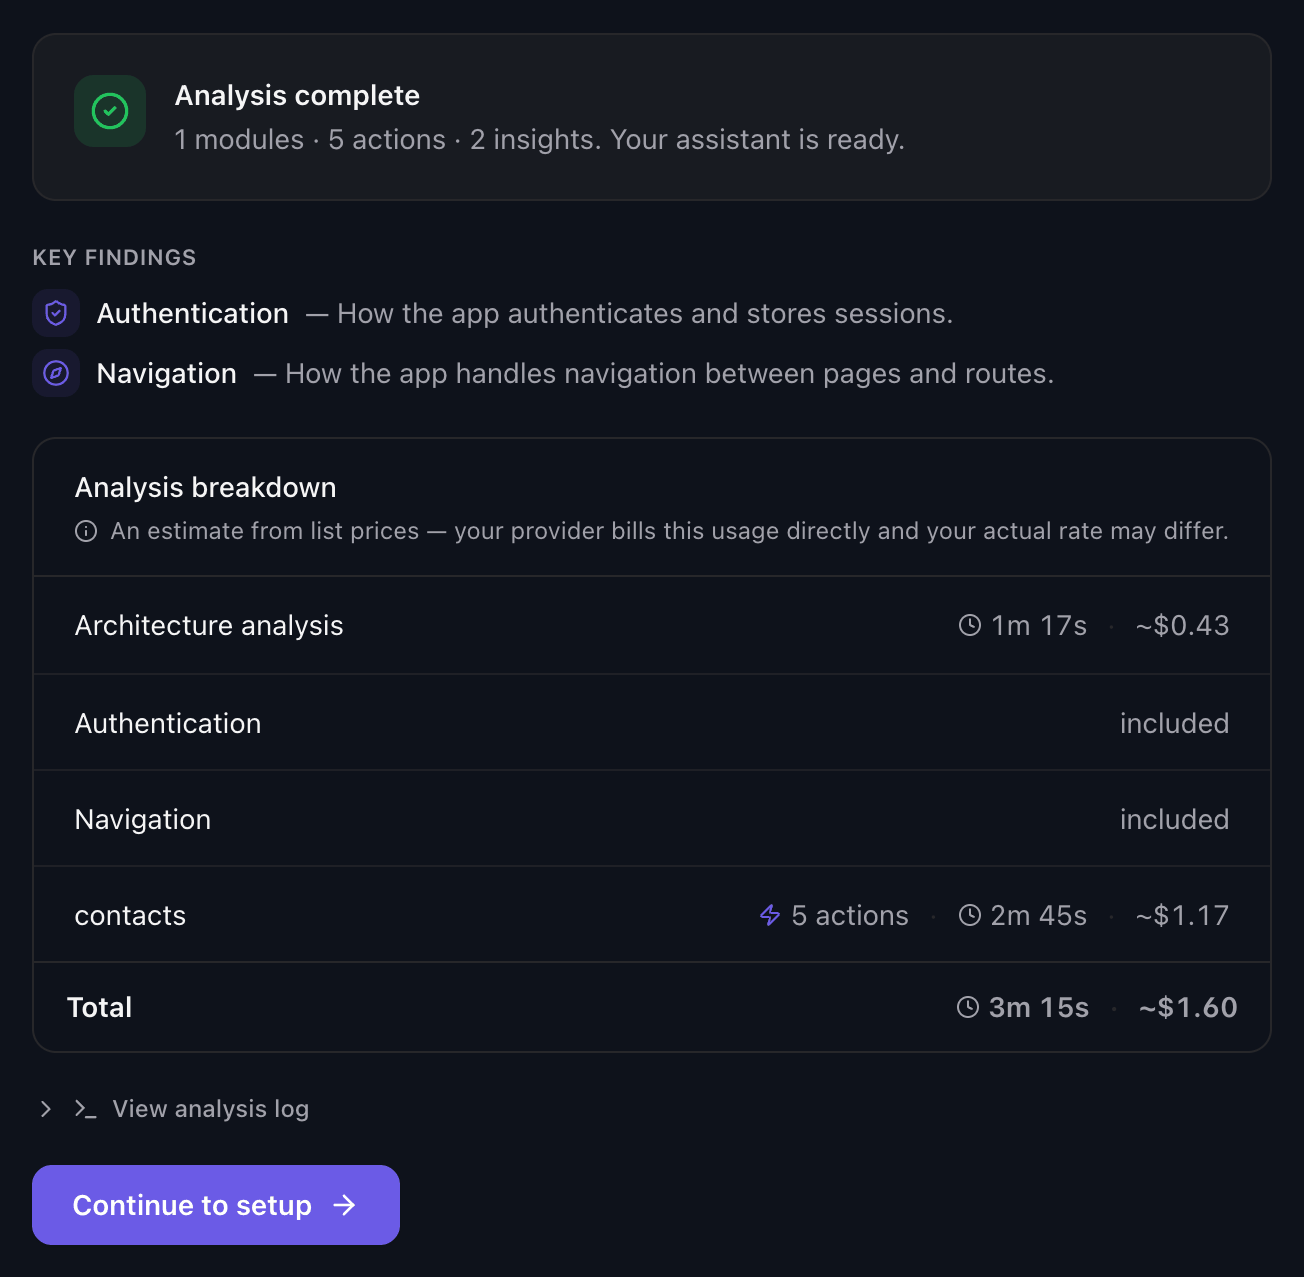
The module shows its progress while Faustine writes its actions. When it finishes, the Summary stage reads Analysis complete with the number of modules, actions and insights. Key findings lists the Authentication and Navigation insights, and Analysis breakdown shows the time and the estimated cost of each part.
Set up and launch the agent
- In the summary, select Continue to setup. The Set up your assistant wizard opens.
- In Get to know your assistant, read the three texts the analysis drafted about the app, then select Continue.
- In Actions, leave every action on and select Continue.
- Select Continue in Web search, Knowledge base, Look & feel and AI model to keep what they show.
- In Install the assistant, select Copy to copy the snippet. Keep it for a later step.
- Select Launch.
Launch publishes the draft as the first version and opens the agent's page. The header shows Production with the version it serves.
Review the actions
- Select the Actions tab.
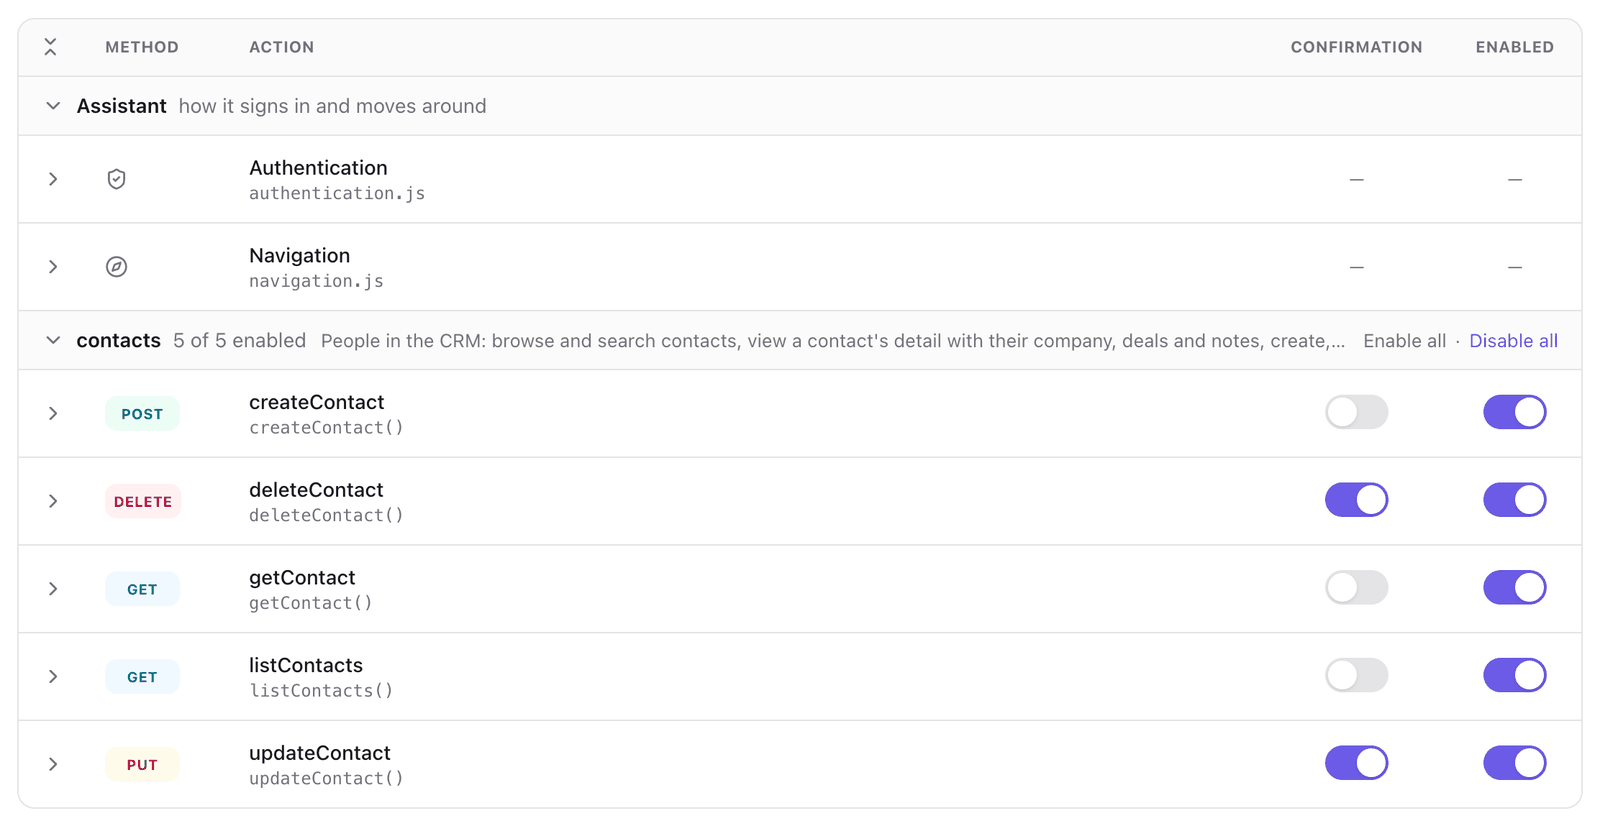
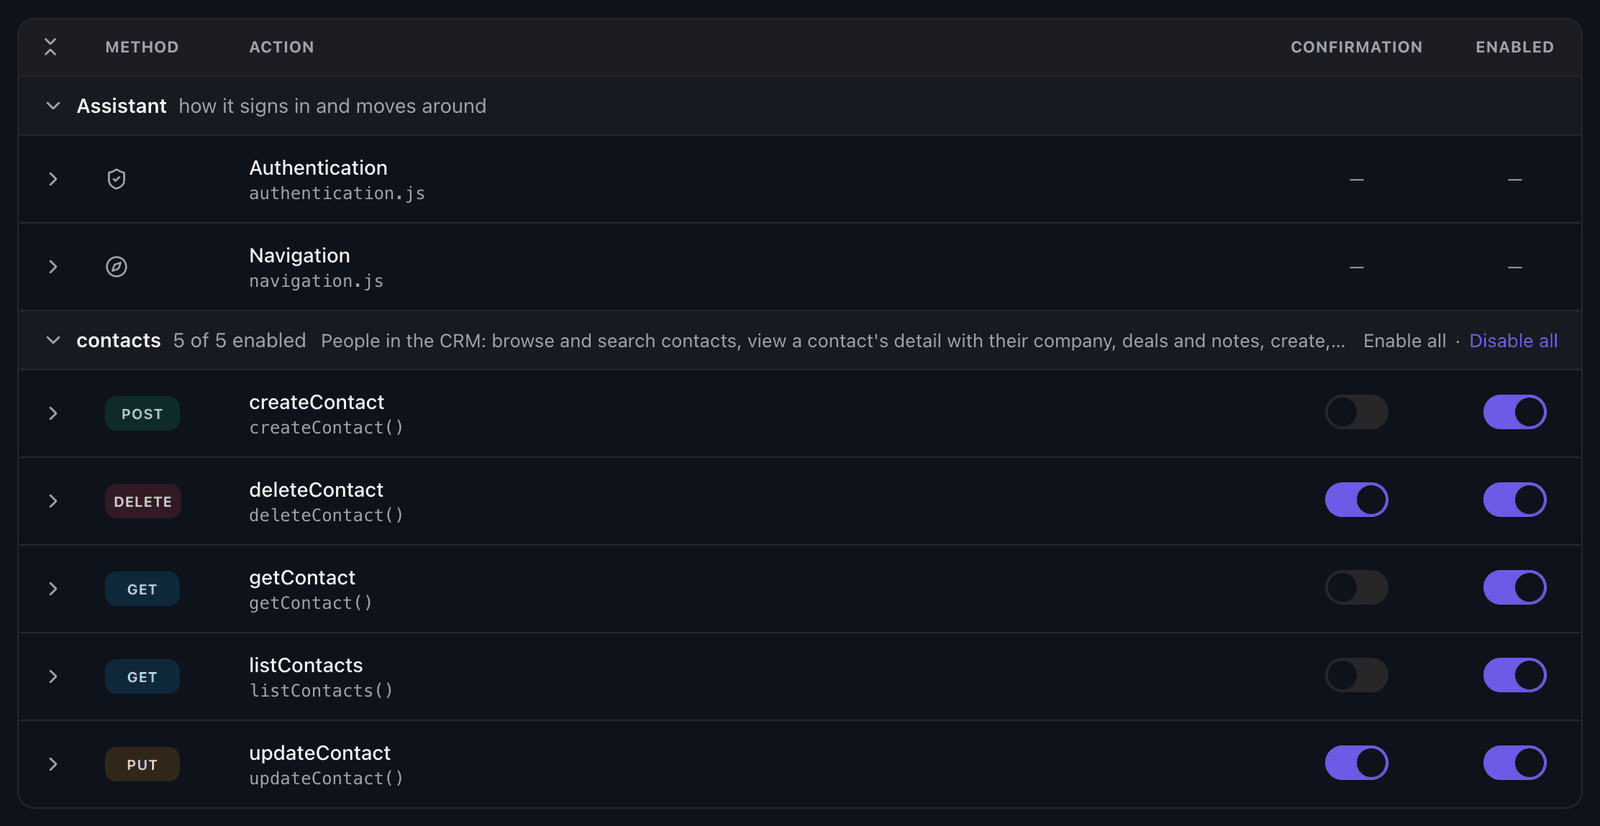
- Find the group for the contacts module. Its row shows how many of its actions are enabled.
- Read the rows. Each one has the HTTP method of its request, a display name and a function name. Nimbus CRM's contacts API has five endpoints, and the analysis writes one action for each:
createContact,deleteContact,getContact,listContactsandupdateContact. - Select the action that creates a contact. Its Parameters include a first name and a last name, which Nimbus CRM requires, and optional fields such as the email.
- Select Back to actions.
The JSDoc you saw is what the model reads to decide when to run the action. The code under it is the request Nimbus CRM itself makes when you save the contact form.
Make the agent ask before updating
The analysis turns on confirmation for every action that sends a DELETE request, so the agent already asks before it deletes a contact. In the row of the action that deletes a contact, the switch in the Confirmation column is on.
To make the agent ask before it changes a contact too:
- In the row of the action that updates a contact, turn on the switch in the Confirmation column.
- In the save bar, select Save changes.
- In the header, select Publish.
The header shows the new version on Production. The widget loads it the next time the page loads.
Install the snippet
- In your clone of the fork, open
app/frontend/index.html. - Add the snippet you copied inside
<head>. It has this form, with your agent's ID.
<script src="https://webagent.faustine.ai/embed?wid=<AGENT_ID>" async></script>- Start Nimbus CRM.
cd app
docker compose up- Open
http://localhost:5173and sign in with[email protected]and the passwordadmin123.
If you did not keep the snippet, it is in the agent's Overview tab, in the Install the assistant card, under JS / Auto.
Checkpoint
The agent's launcher is on the page. It stays there as you move between Contacts, Companies and Deals.
Ask the agent to create a contact
- Open Contacts in Nimbus CRM, so you can watch the list.
- Select the launcher and send this message.
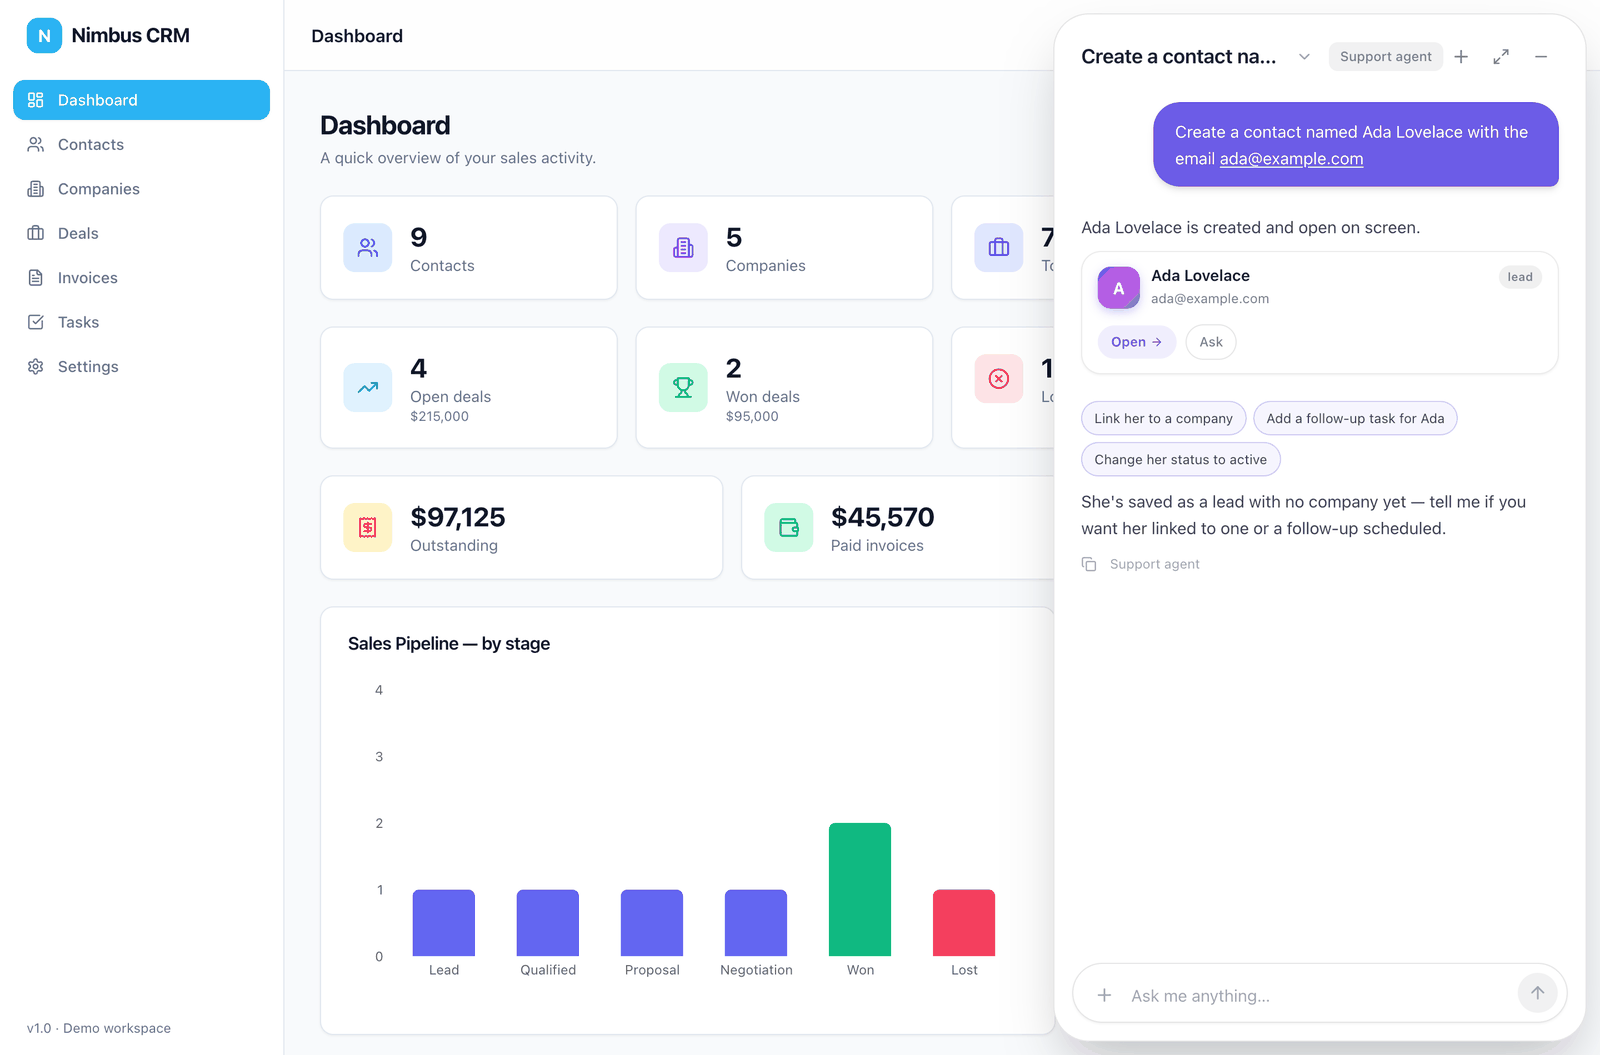
Create a contact named Ada Lovelace with the email [email protected]The agent runs the create action as the user you are signed in as. It replies that the contact was created and shows a card for her, and Ada Lovelace appears in the Contacts list.
- Now send this message.
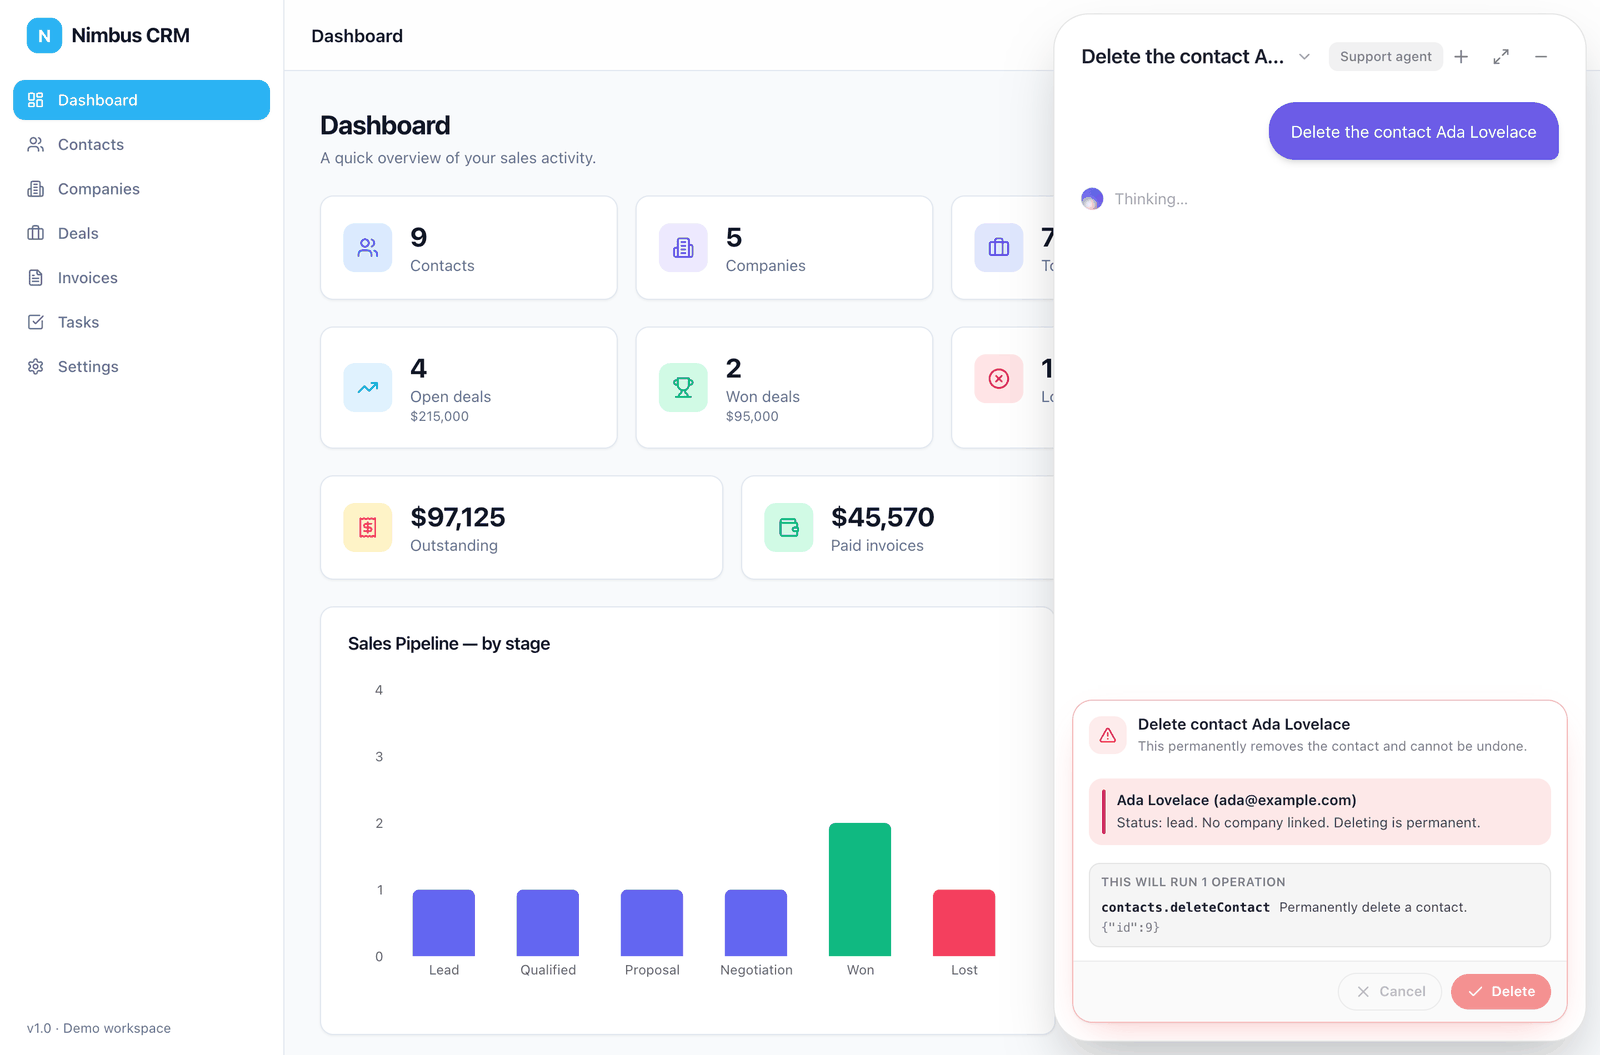
Delete the contact Ada LovelaceThe agent finds the contact, then replaces the message box with a confirmation card that names what it is about to delete. Nothing is deleted yet.
- Select Delete on the card.
The agent reports that the contact was deleted, and the row disappears from the list.
Read the log of the conversation
- In the portal, open the agent's Monitoring tab.
- Under Conversations, select the conversation you just had.
- Go through the turns. Each one has your message and the agent's reply. Where the agent ran an action, the turn shows the call with its Input and its Output.
The create call's input has the first name, the last name and the email the model took from your sentence. Its output is what Nimbus CRM returned.
Troubleshooting
| Symptom | Cause | Fix |
|---|---|---|
| No launcher on the page | The snippet is not in the page, or the page was not reloaded. | Check that app/frontend/index.html has your snippet inside <head> and reload. |
What you built
Your fork of Nimbus CRM has a Web Agent with one module of actions, generated from its front-end code and served on Production. The agent, its actions, its versions and its conversations are under Web Agents in the portal.
Next steps
- Choose what to analyze: add the companies and deals modules.
- Turn an action on or off and test it: run one action without the chat.
- Write the agent's persona: make the agent talk about the CRM in your words.
- Verify your users with a signed token: tell the agent which user is signed in.
- Appearance: change how the widget looks.
Last updated November 13, 2026